install microk8s on centos9

配置aliyun仓库

tee /etc/yum.repos.d/centos.repo > /dev/null << 'EOF'
[baseos]
name=CentOS Stream $releasever - BaseOS - mirrors.aliyun.com
baseurl=https://mirrors.aliyun.com/centos-stream/9-stream/BaseOS/x86_64/os/
gpgcheck=1
gpgkey=file:///etc/pki/rpm-gpg/RPM-GPG-KEY-centosofficial
enabled=1

[baseos-debuginfo]
name=CentOS Stream $releasever - BaseOS Debuginfo - mirrors.aliyun.com
baseurl=https://mirrors.aliyun.com/centos-stream/9-stream/BaseOS/x86_64/debug/tree/
gpgcheck=1
gpgkey=file:///etc/pki/rpm-gpg/RPM-GPG-KEY-centosofficial
enabled=0

[baseos-source]
name=CentOS Stream $releasever - BaseOS Source - mirrors.aliyun.com
baseurl=https://mirrors.aliyun.com/centos-stream/9-stream/BaseOS/source/tree/
gpgcheck=1
gpgkey=file:///etc/pki/rpm-gpg/RPM-GPG-KEY-centosofficial
enabled=0

[appstream]
name=CentOS Stream $releasever - AppStream - mirrors.aliyun.com
baseurl=https://mirrors.aliyun.com/centos-stream/9-stream/AppStream/x86_64/os/
gpgcheck=1
gpgkey=file:///etc/pki/rpm-gpg/RPM-GPG-KEY-centosofficial
enabled=1

[appstream-debuginfo]
name=CentOS Stream $releasever - AppStream Debuginfo - mirrors.aliyun.com
baseurl=https://mirrors.aliyun.com/centos-stream/9-stream/AppStream/x86_64/debug/tree/
gpgcheck=1
gpgkey=file:///etc/pki/rpm-gpg/RPM-GPG-KEY-centosofficial
enabled=0

[appstream-source]
name=CentOS Stream $releasever - AppStream Source - mirrors.aliyun.com
baseurl=https://mirrors.aliyun.com/centos-stream/9-stream/AppStream/source/tree/
gpgcheck=1
gpgkey=file:///etc/pki/rpm-gpg/RPM-GPG-KEY-centosofficial
enabled=0
EOF

配置ip

nmcli connection modify "ens160" ipv4.method manual ipv4.addresses 192.168.213.110/24 ipv4.gateway 192.168.213.2 ipv4.dns "192.168.213.2"
nmcli connection up "ens160"

系统初始化

[root@localhost ~]# systemctl stop firewalld.service
[root@localhost ~]# systemctl disable firewalld.service
Removed "/etc/systemd/system/multi-user.target.wants/firewalld.service".
Removed "/etc/systemd/system/dbus-org.fedoraproject.FirewallD1.service".
[root@localhost ~]# setenforce 0
[root@localhost ~]# sed -i 's/^SELINUX=enforcing$/SELINUX=permissive/' /etc/selinux/config
[root@localhost ~]#
[root@localhost ~]#
[root@localhost ~]# modprobe ip_tables
[root@localhost ~]# modprobe ip_conntrack
[root@localhost ~]# modprobe iptable_filter
[root@localhost ~]# modprobe ipt_state

使用snap安装microk8s

  • 安装snap
[root@localhost ~]# yum install epel-release
[root@localhost ~]# yum install snapd
[root@localhost ~]# systemctl enable --now snapd.socket
[root@localhost ~]# ln -s /var/lib/snapd/snap /snap
  • 安装microk8s
[root@localhost ~]# snap install microk8s --classic
[root@localhost ~]# snap install microk8s --classic
2026-01-21T21:59:26+08:00 INFO Waiting for automatic snapd restart...
Warning: /var/lib/snapd/snap/bin was not found in your $PATH. If you've not restarted your session
since you installed snapd, try doing that. Please see https://forum.snapcraft.io/t/9469
for more details.

microk8s (1.32/stable) v1.32.9 from Canonical✓ installed
  • MicroK8s 会创建一个用户组,以便无缝使用需要管理员权限的命令。要将当前用户添加到该用户组并获得对 .kube 缓存目录的访问权限
[root@localhost ~]# usermod -a -G microk8s $USER
[root@localhost ~]# mkdir -p ~/.kube
[root@localhost ~]# chmod 0700 ~/.kube
[root@localhost ~]# su - $USER
  • 检查microk8s状态
[root@localhost ~]# microk8s status
[root@localhost ~]# microk8s kubectl get pod -A
[root@localhost ~]# microk8s kubectl get nodes

1

[root@localhost ~]# journalctl -u snap.microk8s.daemon-kubelite -n 100 -f
[root@localhost ~]# systemctl status snap.microk8s.daemon-containerd

可以看见下载registry.k8s.io/pause:3.10镜像失败,由systemctl status snap.microk8s.daemon-containerd命令找到容器加速配置
/var/snap/microk8s/current/args/containerd-template.toml

  • 为microk8s配置镜像源加速
[root@localhost ~]# ll /var/snap/microk8s/current/args/certs.d/
[root@localhost ~]# mkdir -p /var/snap/microk8s/current/args/certs.d/registry.k8s.io
[root@localhost ~]# cat /var/snap/microk8s/current/args/certs.d/registry.k8s.io/hosts.toml
server = "https://registry.k8s.io"

[host."https://k8s.m.daocloud.io"]
capabilities = ["pull", "resolve"]
skip_verify = false
[host."https://mirror.azure.cn"]
capabilities = ["pull", "resolve"]
skip_verify = false
[host."https://registry-1.docker.io"]
capabilities = ["pull", "resolve"]
skip_verify = false
[root@localhost ~]# cat /var/snap/microk8s/current/args/certs.d/docker.io/hosts.toml
server = "https://docker.io"

[host."https://docker.1ms.run"]
capabilities = ["pull", "resolve"]
[root@localhost ~]# snap restart microk8s
  • 查看下载的镜像:
[root@localhost ~]# microk8s ctr images ls
  • microk8s状态:
[root@localhost ~]# microk8s kubectl get pod -A
NAMESPACE NAME READY STATUS RESTARTS AGE
kube-system calico-kube-controllers-5947598c79-92cff 1/1 Running 0 12m
kube-system calico-node-k2qsr 1/1 Running 0 12m
kube-system coredns-79b94494c7-jl6rk 1/1 Running 0 12m
[root@localhost ~]# microk8s kubectl get nodes
NAME STATUS ROLES AGE VERSION
localhost.localdomain Ready <none> 12m v1.32.9
  • 启用基础插件
[root@localhost ~]# microk8s enable dns
Infer repository core for addon dns
Addon core/dns is already enabled
[root@localhost ~]# microk8s enable hostpath-storage
Infer repository core for addon hostpath-storage
Enabling default storage class.
WARNING: Hostpath storage is not suitable for production environments.
A hostpath volume can grow beyond the size limit set in the volume claim manifest.

deployment.apps/hostpath-provisioner created
storageclass.storage.k8s.io/microk8s-hostpath created
serviceaccount/microk8s-hostpath created
clusterrole.rbac.authorization.k8s.io/microk8s-hostpath created
clusterrolebinding.rbac.authorization.k8s.io/microk8s-hostpath created
Storage will be available soon.
[root@localhost ~]# microk8s kubectl get sc
NAME PROVISIONER RECLAIMPOLICY VOLUMEBINDINGMODE ALLOWVOLUMEEXPANSION AGE
microk8s-hostpath (default) microk8s.io/hostpath Delete WaitForFirstConsumer false 5s

更多插件:https://canonical.com/microk8s/docs/addons

microk8s集群添加Worker节点

  • 新增worker节点并安装好microk8s集群,版本需要一致
[root@localhost ~]# microk8s kubectl get nodes
NAME STATUS ROLES AGE VERSION
localhost.localdomain Ready <none> 90m v1.32.9

[root@localhost ~]# snap install microk8s --classic --channel=1.32
2026-01-21T23:43:08+08:00 INFO Waiting for automatic snapd restart...
Warning: /var/lib/snapd/snap/bin was not found in your $PATH. If you've not restarted your session
since you installed snapd, try doing that. Please see https://forum.snapcraft.io/t/9469
for more details.

microk8s (1.32/stable) v1.32.9 from Canonical✓ installed
[root@localhost ~]# hostnamectl set-hostname microk8s-worker
[root@microk8s-worker ~]# microk8s kubectl get nodes
NAME STATUS ROLES AGE VERSION
localhost.localdomain NotReady <none> 2m41s v1.32.9
  • worker节点配置镜像加速,参考上面
[root@microk8s-worker ~]# microk8s kubectl get nodes
NAME STATUS ROLES AGE VERSION
localhost.localdomain NotReady <none> 7m34s v1.32.9
microk8s-worker Ready <none> 2m44s v1.32.9
[root@microk8s-worker ~]# microk8s remove-node localhost.localdomain
[root@microk8s-worker ~]# microk8s kubectl get nodes
NAME STATUS ROLES AGE VERSION
microk8s-worker Ready <none> 2m55s v1.32.9
[root@microk8s-worker ~]# microk8s kubectl get pod -A
NAMESPACE NAME READY STATUS RESTARTS AGE
kube-system calico-kube-controllers-5947598c79-zp6wc 1/1 Running 0 7m41s
kube-system calico-node-h2rzw 1/1 Running 0 116s
kube-system coredns-79b94494c7-zpd9n 1/1 Running 0 7m41s
  • 从192.168.213.110上添加worker节点192.168.213.111
    获取token添加方式:
[root@localhost ~]# microk8s add-node
From the node you wish to join to this cluster, run the following:
microk8s join 192.168.213.110:25000/3261736fb5043b8367253a69ee907dc5/7f32c8813166

Use the '--worker' flag to join a node as a worker not running the control plane, eg:
microk8s join 192.168.213.110:25000/3261736fb5043b8367253a69ee907dc5/7f32c8813166 --worker

If the node you are adding is not reachable through the default interface you can use one of the following:
microk8s join 192.168.213.110:25000/3261736fb5043b8367253a69ee907dc5/7f32c8813166
  • 在worker节点上操作如下:
[root@microk8s-worker ~]# microk8s kubectl get nodes
NAME STATUS ROLES AGE VERSION
microk8s-worker Ready <none> 4m3s v1.32.9
[root@microk8s-worker ~]# microk8s join 192.168.213.110:25000/3261736fb5043b8367253a69ee907dc5/7f32c8813166 --worker
Contacting cluster at 192.168.213.110

The node has joined the cluster and will appear in the nodes list in a few seconds.

This worker node gets automatically configured with the API server endpoints.
If the API servers are behind a loadbalancer please set the '--refresh-interval' to '0s' in:
/var/snap/microk8s/current/args/apiserver-proxy
and replace the API server endpoints with the one provided by the loadbalancer in:
/var/snap/microk8s/current/args/traefik/provider.yaml

Successfully joined the cluster.
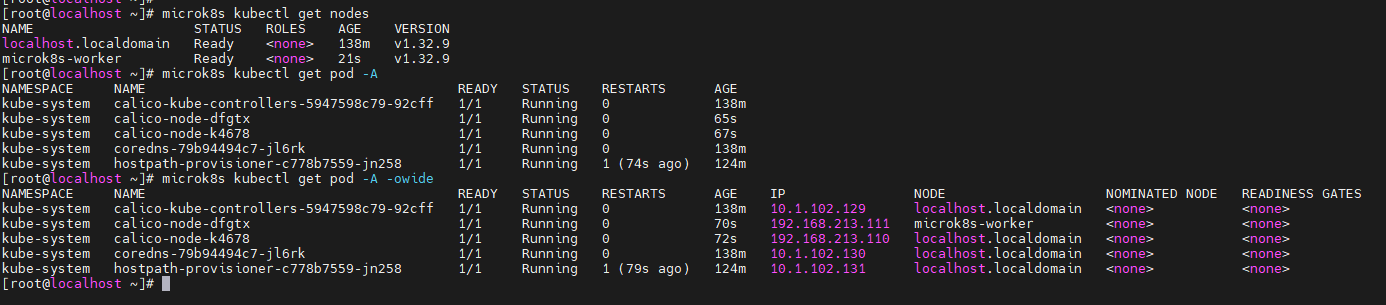
添加成功后,在110节点上查询

[root@localhost ~]# microk8s kubectl get nodes
NAME STATUS ROLES AGE VERSION
localhost.localdomain Ready <none> 138m v1.32.9
microk8s-worker Ready <none> 21s v1.32.9

2

特别注意:在 MicroK8s 集群中,所有集群级别的管理操作,都需要在 Master 节点(即控制平面节点)上执行。Worker 节点的职责是运行工作负载,而不是管理集群本身
所以启用插件只需要在master节点操作就行,如果master事先已经启用了某些插件,那么加入的worker后就不需要再次启用了

[root@localhost ~]# microk8s enable dns
Infer repository core for addon dns
Addon core/dns is already enabled
[root@localhost ~]# microk8s enable hostpath-storage
Infer repository core for addon hostpath-storage
Addon core/hostpath-storage is already enabled